Glo Gloves Add Safety to Night Riding

If you’d rather ride than read, skip straight to the video

I stuck my video camera on a RAM mount on my buddy George Primm’s bike and asked him to hang with me on a ride through West Palm Beach and Palm Beach. George was a copy editor  in his former newspaper life, not a photographer, but he did an OK job.

His bike had some fairly low-powered lights, so the reflectors would have shown up much brighter in car headlights. Still, you can get a pretty good idea of how your signaling is much clearer with the Glo Gloves.

For you detail-oriented folks:

Glo Gloves make your signals visible under low light

I’m a night rider. I like it because it’s cool and traffic is calmer and better behaved at night.

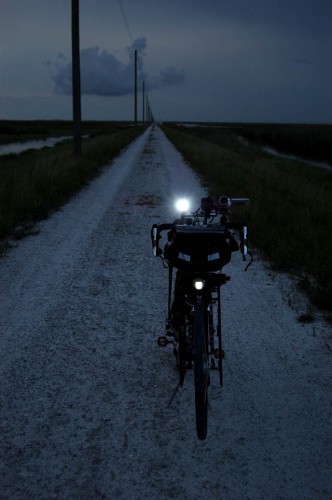
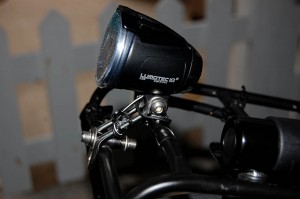
To see and be seen, I have a SON generator powered B&M Lumotec IQ Cyo R N Plus light on the front, along with at flashing 5-LED ViewPoint Flare.

In the back, I have two taillights. A huge 4×6-inch 18-LED RealLite flashes like a billboard and a solid generator-powered B&M Busch&Müller 4DToplight Senso Multi with battery standlight. I used to have a NiteRider taillight, but my battery died and I haven’t felt the need to replace it.

I’m a fan of reflective material
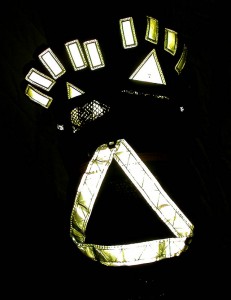
Slow Moving Vehicle triangle and Glo Gloves on Camelbak M.U.L.E.I have a large Slow Moving Vehicle Triangle on the back of my CamelBak M.U.L.E.. I also stick my Glo Gloves where they add some flash back at vehicles behind me when I’m not wearing them.
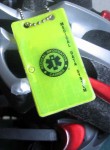
Medical Data SystemAfter my riding partner had an accident in the middle of nowhere and I didn’t have any contact info for her family, I wear two Medical Data Information tags made of reflective material.

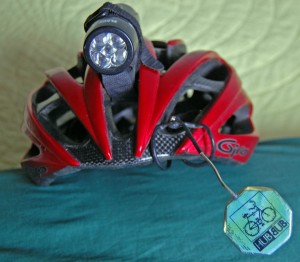
One is attached to the back of my helmet (you’ll be able to see it flashing in the video); the other is on the Camelbak.

So, what are Glow Gloves?

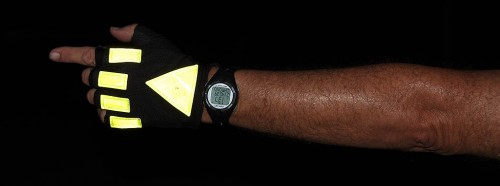
Glo GlovesIn 2003, someone named Glolady asked if any of the folks on the phred bike touring list would like to test some prototype gloves. Shortly after I volunteered, a pair of Glow Gloves arrived. They looked pretty much like the Original Glo Glove shown on the web site.

I really liked the large red triangle on the palm, but they weren’t overly comfortable on the bike and they tended to slip on the bars. They were redesigned with the red reflective material higher on the wrist and a better gripping palm and named the Sport Glove.

Not enough padding in the right places

I still didn’t like them as a standalone biking glove, because they didn’t have enough padding in the right places for my taste.

What I DID discover was that they were stretchy enough to pull right over my normal gloves when I wanted that extra bit of visibility.

I rediscovered Glo gloves recently
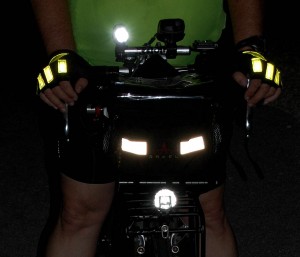
Glo Gloves show up well with your hands on the barsI’ve been riding with some new folks lately and I’ve been stressing about how you need to claim your space on the road and to clearly convey your intentions.

I pulled on the Glo Gloves and found myself interacting with drivers more (and not just with a single digit). If I’m coming up to an intersection and see a car that looks like he may pull out, I’ll holler or whistle loudly while holding up a highly reflective hand. It’s actually more effective than my Delta Airzound Bike Horn in some cases. As I pass the intersection, I’ll give a friendly wave “thanking” them for doing the right thing, like not running over me.

Another nice thing is that the gloves add reflectivity to the front and sides of your bike when your hands are on the bars.

(The two white horizontal reflectors are on the Arkel Small Bar bag.)

Editor’s note: My Glo Gloves were provided for evaluation in 2003 and GloLady was kind enough to send me a new pair for review to make sure that I had the latest version. You can go to the Glo Glove website to find a dealer.

Bike Tools I Carry

When you were a kid, you probably heard this nursery rhyme poem:

For want of a nail the shoe was lost.

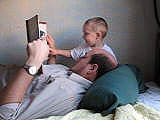
Matt and Malcolm Steinhoff reading bookFor want of a shoe the horse was lost.

For want of a horse the rider was lost.

For want of a rider the battle was lost.

For want of a battle the kingdom was lost.

And all for the want of a horseshoe nail.

For the want of a bolt, a ride was lost

Everything was coming together for a great ride last night. The temps were reasonable, the winds were light and I was hitting the road about an hour before dusk. Son Matt and I had ridden a bumpy unpaved road on our last outing, and it felt like maybe my seat had dropped just enough to be noticeable.

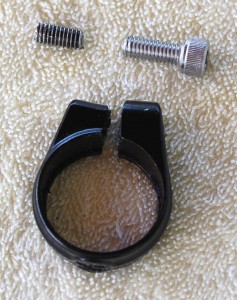
Surly Long Haul Trucker seat post clampI pulled into the parking lot of my old newspaper to chat with a former coworker who was walking out and to raise the seat a tad. Because I thought it had slipped, I cranked down hard on the bolt that holds the seat post in place. Then, “just to be sure,” I gave it that one extra little erg of a twist. One erg too many. The bolt snapped off.

I’ve been accused to carrying everything on my bike, but the one thing I DIDN’T have was a spare bolt. I looked at all the other bolts on the bike to see if I could re-purpose one, but no joy.

I COULD have made it the two miles home looking like Groucho Marx pedaling down the road, but I wimped out and asked Wife Lila to fetch me.

Three bolts – two spares

I made a morning trip to George’s Hardware for a new bolt and two spares.

That gave me a chance to do an inventory of the tools and repair stuff I carry on a routine basis.

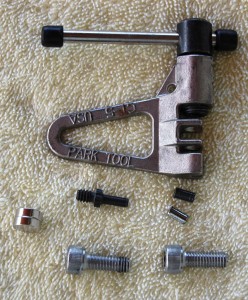
Park Chain Tool, magnets and the bolts

Park Tool CT-5 Mini Brute Chain toolI bought a Park Tool CT-5 Mini Brute Chain Tool before I knew how to use it. My theory was that you’re always better off to have a tool with you.

How many times have you been broken down on the side of the road and have someone say, “I could get you running if I just had a triple-gaited Throgmartin?”

As it turned out, it was good investment. Son Matt and I were riding the Withlacoochee Trail one weekend when my gears started shifting all by themselves at random intervals.

I noticed that the master link of my chain was sticking out just enough to cause the chain to move in or out, causing the gears to shift. No problem. There was a bike shop alongside the trail in about five or six miles.

Then I made the mistake of standing up on the pedals. SNAP! went the chain.

Necessity makes for a fine teacher. Matt managed to get the chain back together well enough that we could get to the LBS.

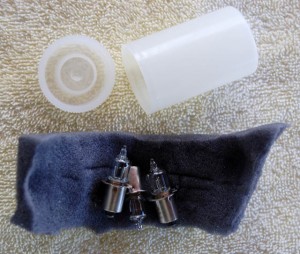
At the bottom left, you can see a couple of rare earth magnets that work better than the normal magnets that come with your bike computer. They also do a great job of keeping all those small parts together inside a plastic film can. (I’m sure glad I have a stockpile of those left over from my shooting days.)

Keeping the bicycle tires going round and round

Flat tires and out-of-true wheels can leave you stranded if you can’t do quick fixes. I always carry one spare tube if I’m riding in town. If I’m going somewhere remote, I’ll carry two, plus a patch kit.

I HAVE needed two tubes. I haven’t needed the patch kit yet. (I also have a small tube of Super Glue in the box with the patches.)

This is an area where I have the most (maybe unnecessary) redundancy.

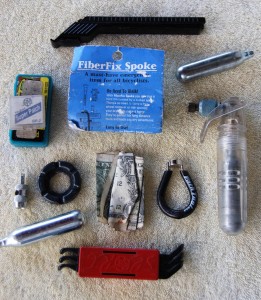
  • Two sets of tire tool levers: A generic set and a Crank Brothers Speed Lever. The Crank Brothers lever hasn’t worked on every tire I’ve tried to use it on, but when it does, it’s slick.
  • Two spoke wrenches. I think I picked up the Park Tool Spoke Wrench and then found that I had left it at home when I needed it to compensate for a broken spoke. That’s when I got the second one. I carry both. That way I’ll have a spare when I drop the first one in the tall grass.
  • Tires_3051A couple of one dollar bills. You can spend them or use them as an emergency boot in the tire. (If you don’t have a dollar bill, four quarters won’t work.)
  • A Kevlar FiberFix Emergency Spoke Replacement Kit. I could have used it once when I broke a spoke in Missouri. I managed to bring the wheel back into round enough to ride home, but if I had been out in the middle of nowhere, the Kevlar could have been a ride-saver.
  • A tool for removing Schrader valves. Again, it’s one of those things I’ve only needed once, but it saved a lot of fumbling around.
  • A CO2 inflator (similar to the Innovations Ultraflate Plus CO2) and a couple of cartridges. I picked an inflator that will use threadless cartridges available at almost any sporting goods store. Considering that I have a Topeak Road Morph Pump with Gauge, I really don’t need these. On the other hand, when you’re being carried off by mosquitoes, it’s nice to be able to get that tire inflated in a hurry.

Surly Long Haul Trucker carries spare spokes

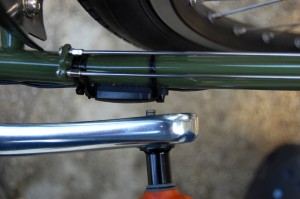
Surly Long Haul Trucker spoke holder and rare magnetsOne of the the things I like about my Surly Long Haul Trucker is that it carries two spare spokes on the chain stays. That’s just another example of how this bike is well-designed for the bike tourist. Note the two Rare Earth magnets on the back of the crank arm.

The multi-tool gets used more than any other

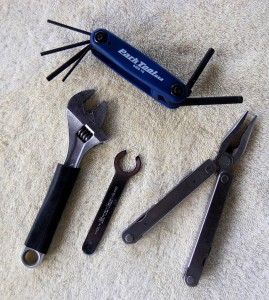
tools_3055I’ve used several multi-tools over the years. My favorite was a bright yellow Pedro tool that I managed to kill. My wife, bought me a new Pedro, but it’s blue, not yellow. I generally carry the one she gave me and this one. They’re similar. One stays in my Arkel Small Bar Bag or CamelBak M.U.L.E. and the other lives with the other tools in the Arkel Tail Rider Trunk Bag.

I very seldom use the adjustable wrench, but it’s handy when you come upon somebody riding a cheap *-Mart bike who needs help. I keep a short length of innertube over the handle. It cushions the grip, can be cut up into spacers or rubber bands and can be used as a tire boot.

The open-ended wrench is a Brooks Adjustment tool. If you have to ask, you shouldn’t own one.

The Leatherman Tool takes care of just about anything the other stuff won’t handle.

Emergency lights for my bike

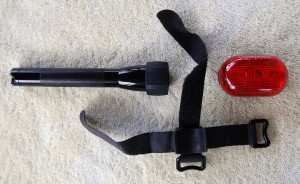
Maglight, handlebar attachment and bicycle taillightA Mini Maglite is always handy if you have a breakdown, need some light to find something you’ve dropped or if your primary lights go out. The strappy thing is a handy mount that will let you quickly and securely attach your Maglite to your handlebars.

The Maglite and the inexpensive flasher see most of their use when I invite a newbie on a night ride or we get caught out after dark. The Maglite makes a great be-seen light and will do an adequate job of lighting the road. I used to rig it to my helmet with the bar mount when I wanted some extra light.

I don’t need Halogen bulbs anymore

Halogen generator light bulbsOne thing I can get rid of is my stash of three spare halogen bulbs for my Lumotec generator lights. Halogen lights get dimmer as they age, they blow out and they’re hard to find. Now that I’ve switched my halogen lights for a Lumotec IQ Cyo R N LED light, I won’t need to carry them anymore. I won’t be sorry to get rid of them.

It all fits in a cloth bag

I keep all the tools inside a plastic Ziploc bag inside a cloth bag that telephone headsets came in.

How much does it weigh? Got me. I don’t have a scale to weigh myself because ignorance is bliss. Compared to me, the weight of the tool bag is negligible.

I’d have been happy to have been carrying the weight of an extra bolt the other night.

For want of a nail the shoe was lost.
For want of a shoe the horse was lost.
For want of a horse the rider was lost.
For want of a rider the battle was lost.
For want of a battle the kingdom was lost.
And all for the want of a horseshoe nail.
For want of a nail the shoe was lost.

For want of a shoe the horse was lost.

For want of a horse the rider was lost.

For want of a rider the battle was lost.

For want of a battle the kingdom was lost.

And all for the want of a horseshoe nail.

Sandisk Sansa Clip vs iPod Classic

After much nagging and cajoling by Bro Mark, I bought a 40 GB iPod Classic MP3 player back in 2004. It cost $483, including shipping.

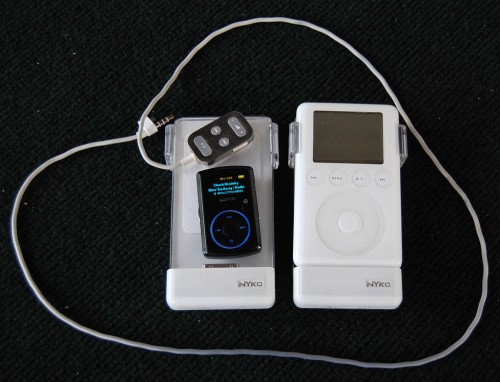
iPod, spare batteries, remote control and SanDisk Sansa ClipAlmost immediately, I discovered that the battery wouldn’t carry it through a long ride, particularly if I hadn’t charged it completely from the ride the day before. Bro Mark turned me on to woot.com, which had special twofer deal going on a Nyko iBoost Battery Pack for iPod for about $20.

These puppies added some size and weight to the Classic, but they also meant that I rarely ever ran out of juice. And, if I did, I could pop on the backup battery pack and be back in business.

iPod remotes were getting hard to find

I rode with the Classic in the MP3 player pocket on the back of my CamelBak MULE, with the remote cord plugging into my Active Tunes iRide Pro speaker. The only problem was that the remotes were getting hard to come by and my last one was starting to sound like it might have a short.

My kid loved his SanDisk Sansa Clip

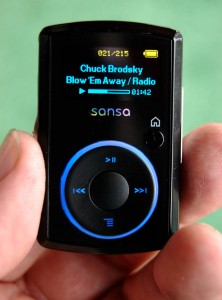
SanDisk Sansa ClipA couple of years ago, Woot ran a special for the SanDisk Sansa e250 for about $20. I bought one for Son Matt and he loved it. It was small, the battery life was excellent and, with an external speaker, it was great on the bike and in the shower. He’s a big fan of podcasts and it did a good job on those. It also had an FM radio built in.

He was whining the other day about one of the speaker channels dropping out, so I started looking for a replacement for his Birthday Season. CompUsa had a refurb 2 GB SanDisk Sansa Clip for about $30 that was comparable to what he had, so I snagged it.

Audiobooks and Nitrous Oxide

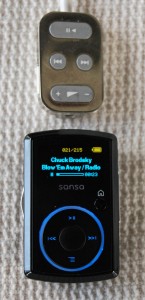
Clip and iPod remoteThe more I looked at his, the more I was intrigued. The whole shebang is barely bigger than the remote control on my iPod. Sure, it doesn’t hold 40 gigs, but I don’t really need to be able to play a month of music without repeats.

I make do with about four playlists and that’s it. (I also keep an audiobook handy for the trips to the dentist. An audiobook and nitrous oxide makes the hour go fast. I’ve devoted one mystery audiobook to the dentist and I’ve been listening to it for two years. I may NEVER get to the end of it.)

I decided I wanted the 4GB SanDisk Sansa Flip

If 2GB is good, then 4GB has to be better, right?

CompUsa had them online, but not at the local store. BestBuy had a new, not refurbished, Clip in stock for not much more than I would have paid for a refurb plus shipping. Better yet, it came with a 12-month warranty. That pushed me over the edge. I got it for about $60. WAYYYY better than $483.

What I like about the 4GB SanDisk Sansa Flip

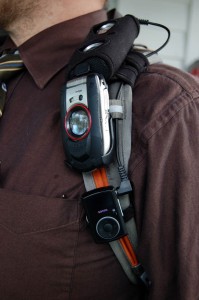
  • SanDisk Sansa Clip on CamelBak below cell phone and i-Ride Pro speakerI loaded in a playlist I built in Windows Media Player that contained 188 songs and still had 2.4GB of free space.The built-in rechargeable battery will play for up to 15 hours
  • It charges through a standard USB mini plug, the same connector as my flash card reader, Olympus WS-500M Digital Voice Recorder, portable hard drives and Garmin nüvi 760 GPS.
  • It has a built-in FM radio tuner which works surprisingly well.
  • It’s tiny: about .7″ deep, 1.4″ high and 1.4″ wide. Like I said, just barely bigger than the remote control for my iPod.
  • Four-line OLED display that’s really bright.
  • Reasonable intuitive controls. All I need are pause, skip and volume when I’m on the bike.
  • It connects to my Active Tunes i-Ride pro with a standard miniplug.

Past reviews of MP3 speakers

I’ll post a follow-up review after I get a few more miles on it.

How to Install B&M IQ Cyo R N Plus Headlight

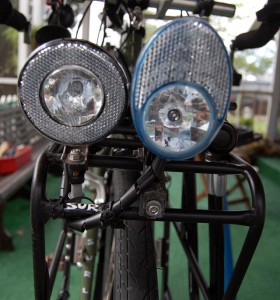
Surly Long Haul Trucker with Cyo IQ and Flare5 headlghtsI just bought a Busch & Muller Lumotec IQ Cyo R N Plus (hereafter referred to as the Cyo IQ) headlight in my eternal quest for the best and brightest light I can pair with my SON generator hub.

A review on one of my favorite bike blogs, EcoVelo, tipped me over the edge. Alan@echoVelo promised to write a letter to spouses because his endorsement generated lots of comments from folks like me who were going to reach for the plastic.

I’ve only had a chance to do one quick ride with it. Son Matt and I went out on shellrock roads in the middle of nowhere the other night, but we were hurrying back to beat mosquito o’clock and I didn’t have a chance to see it in complete darkness. I’ll post a full performance review later.

Here’s an overview of the light and how to install it in this review.

One Cyo IQ will replace two lights

I’ve used three generator-powered headlights with my SON.

(SON, by the way, has no relationship to Son Matt or Son Adam. It stands for Schmidt’s Original Nabendynamo. That mouthful is why most folks call it a SON.)

Lumotec and dLumotecI started out with a Lumotec Oval Plus halogen bulb light as the primary, with a Busch & Müller Lumotec as a secondary.

The primary light would get up to full power at about 10 mph, and the secondary would be at full brightness at around 14 mph. The bad thing is that halogen bulbs get progressively dimmer as they age and eventually burn out. You can’t get one of these bulbs at a 7-11 in the middle of nowhere.

DLumotec offered more light at lower speed

Then B&M introduced the DLumotec Oval N Plus, which used a 1-watt LED as a light source. It reached full power at slightly over walking speed, never dimmed down and was rated at 100,000 hours, so there was no reason to ever turn it off.

The old Missouri safety slogan, “Lights On for Safety” was drummed in my head at an early age, so I LIKE to ride with my lights on.

The LED light was powerful enough that I rarely switched on the secondary light unless I wanted to aim the LED light close to the bike and the secondary down the road.

If you hate to read, here’s a video of the Cyo IQ installation

What comes with the Cyo IQ?

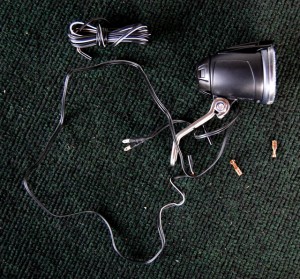
B&M Lumotec IQ Cyo N PlusYou get the light, with a bracket suitable for mounting to your fork; two female spade lugs (more about those later), a spare piece of wire and a couple of pieces of heatshrink tubing and a multi-language instruction sheet.

Coming out of the end of the light are two sets of wires.

  • A short pair with two male spade lug attachments.
  • A longer wire with no connectors.

The Cyo IQ R N Plus light comes in different flavors

The N designator means that it has a straight On/Off switch. A Senso version comes on automatically. Since I run with it on all the time, that didn’t appeal to me.

B&M Lumotec IQ Cyo R light patternThe R means it has a reflector, which is required in Germany, where it’s made. The R models are set up so that the “nearfield” is lit, something that is useful for low-speed commuters and loaded tourists. The standard model projects a brighter, more focused beam farther out for folks who go fast.

Front of B&M Lumotech IQ CYo N R Plus bicycle headlightBoth of them have a sharp cut-off at the top of the beam pattern to keep from blinding oncoming traffic, just like your car headlight. Peter White’s site does a great job of comparing light outputs.

The Plus means that it has a standlight. A capacitor stores enough energy from just a few minutes of pedaling so the light will stay on when you’re stopped. That means your light doesn’t go out when you’re at a traffic light.

I mounted it on my Surly Nice Rack

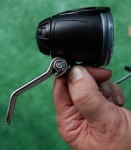
B & M Lumotech IQ Cyo R N Plus mountThe light is designed to mount on the fork crown, so it’s shipped in a forward-leaning position to give clearance. I opted to mount it on the front of my Surly Nice Rack, where that would have had it sticking way out in front, vulnerable to being knocked about.

I reversed the mount, which allowed it to sit back where it’ll be less likely to be hit.

B&M Lumotec IQ Cyo N R Plus headlight on Surly Nice RackI’m very pleased with how neatly put together and compact the unit is. I had some issues with the dLumotec switch being a bit finicky sometimes. The On / Off switch on this light seemed to be much more positive. (Of course, in my case it’s really just an ON switch.)
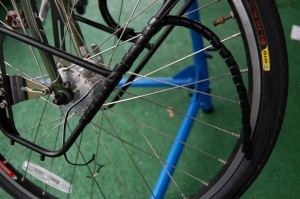
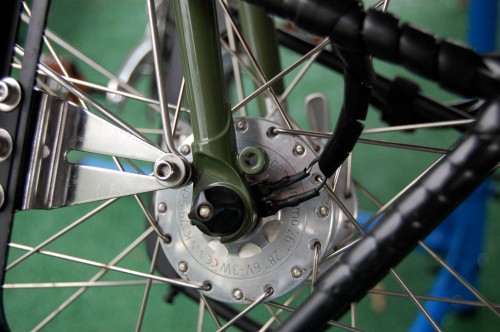
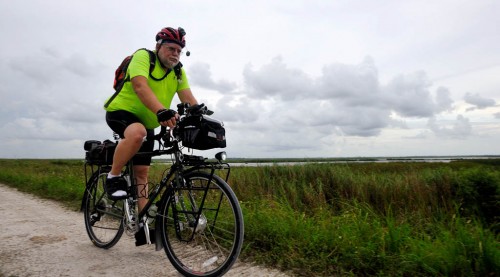
Split tubing protects B&M Lumotec IQ Cyo wiring to SON hubPlastic split tubing protects the wiring

I used plastic 3/8″ spiral cable wrap or split tubing to run the wiring down the rack and to protect it. You can pick it up at Radio Shack or on Amazon.

It’s quick to apply, holds well and blends in with the black rack so it’s hardly noticeable. I like it better than black electrical tape which can turn into a gummy mess if you ever have to deal with the wiring in the future.

What about those terminals?

B&M Lumotec IQ Cyo headlight connections to SON hubI have one major nit to pick.

The light came with two small female spade lugs to go onto the end of the wires leading to the hub. I’m a belt-and-suspenders kind of guy, so I carefully soldered the lug in addition to crimping them. You can’t beat both a good electrical AND mechanical connection. Then I put heatshrink tubing over THAT.

Then, and only then, did I look closely at the male connection points on the hub.

Think Great Dane mating with a Chihuahua. It ain’t gonna happen. Or, even if it’s possible, it’s gonna require some serious bending and stretching.

On top of that, they’re some funky metric size.

Instead of chasing all over trying to find new terminals, I opted to reuse the ones off my old light. I didn’t really want to do that, but it was the easiest and fastest solution to get on the road.

Ken Steinhoff giving B&M Lumotech IQ Cyo headlight trial run

Son Matt shot this on the light’s inaugural run. For the record, I don’t usually wear white socks with my Shimano sandals. We were going to Bug Country at dusk and I wanted to be prepared to cover as many gnawable areas as possible as quickly as possible.

Where can I buy a Lumotec IQ light?

Alan, at EcoVelo, got his review light from The Bicycle Business in Sacramento, CA, so I decided to throw them some business, even though I usually buy this kind of thing from Peter White.

My only complaint – and it’s my fault for not looking at a map – is that California is a L-O-N-G way from Florida if you’re shipping by ground. I placed my order on Monday evening, August 17, it was shipped by Bicycle Business the next day, but didn’t arrive in South Florida until Monday, August 24.

I may stick with East Coast vendors in the future, not because I’m unhappy with Bicycle Business or manager Bob Rolke, but because I can get faster shipping from companies on this side of the Mississippi.

The light cost $103.95 plus $11.23 shipping.

I’ll have another review when I’ve logged some nighttime hours.

Busch Muller Lumotec IQ Cyo Plus

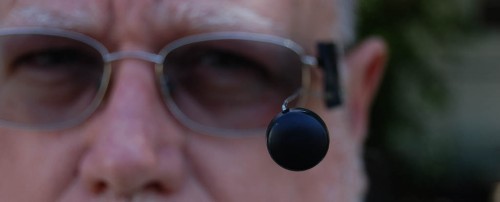
MessengerMirror, a Cheap Eyeglass Cycling Mirror

Bruce left a comment on my review of bicycle mirrors: A shameless plug – I couldn’t find a mirror I liked or could afford, so I made my own. Please take a look… messengermirror.com

He and I exchanged some email, I went to his website and he sent me a mirror to review.

MessengerMirror

First reaction to the MessengerMirror

Holy cow, this came in a regular business envelope with part of a Wild Bunch fruit punch box as a stiffener. No wonder he can sell it for $4.99 plus .88 postage.

Second reaction to the MessengerMirror

This ain’t gonna work. This thing looks really Mickey Mouse. (OK, Mickey has been around a long time, so maybe that’s not necessarily a bad thing.)

I wear wire rim glasses. I’ve never been able to get a Chuck Harris eyeglass mirror to work with them.

I wasn’t happy when I installed the mirror the way Bruce’s instructions show it on the bottom right. It didn’t give me a tight fit.

Bruce sent me a picture that another user had taken where he ran the glasses frame through in the opposite order. I tried that and it held the mirror much better.

MessengerMirror cycling mirror from sideHow did the MessengerMirror perform?

Not too badly. With a little adjustment, I could see behind me. I was a little more aware of the mirror frame in my peripheral vision than I liked, but that might go away with practice.

The mirror vibrated more than my Chuck Harris mirror, which is made from a bike spoke and is rigid. The mirror itself tended to “drift” from the initial left-right adustment. I could actually see it moving until it got to a place where it was happy. After a few adjustments, it must have figured out who was boss and decided to stay put.

It would work better on wider framed glasses

There was more movement than I liked. There was sort of a bounce to the mirror, which tugged on my glasses. I kept wanting to push up my glasses to compensate for it. In fairness, there’s not a whole lot for the mirror to grab on to with my skinny wire glasses.

Would I use or recommend the MessengerMirror

I’m going to give it a qualified endorsement. If you’ve always wanted to try a head-mounted mirror, but didn’t want to spend in excess of 20 bucks, this is a good introduction. If you like the MessengerMirror, then you’ve saved some money. If you like the concept, but don’t like the hardware, then go with a Harris or equivalent.

Chuck Harris Mirror on helmetI don’t think I like the concept of an eyeglass mirror since I wear the same glasses on and off the bike. I’d rather have a helmet mirror that stays in the same place instead of having to be put on and taken off.

And, I’ve got to be brutally honest here, the thing looks dorky even by MY standards. The piece that holds it to your glasses looks like something I’d rig up, and that’s not a compliment. Still, you have to keep saying to yourself, I can’t see it, it works and it cost $4.99 plus .88 postage.

Will it fit on a helmet?

I eyeballed it to see if I could make if fit on my helmet, which might erase some of my objections to the mirror. I’m going to let some glasses-wearing friends try it out first, then I might experiment with helmet mounting.

Bruce’s MessengerMirror video

Here’s a video that appears on the MessengerMirror website. It does a good job of telling you how to adjust it.