Lake Okeechobee Scenic Trail (LOST) Map

Lake Okeechobee Scenic Trail (LOST) is one of my favorite places to ride. Here’s an unofficial map I put together to show which parts are paved, which parts require you to go on surface roads, trail heads and access points, and a few places to eat.

I plan to do a much more comprehensive piece on the LOST, but I’ve had enough recent requests for information that I thought I’d put this up as a stop-gap.

Lake Okeechobee Scenic Trail (LOST)


View Lake Okeechobee Scenic Trail in a larger map

I encourage you to click on the link to a larger map. It’s easier to see in a new window.

Blue = LOST; Red = Roads

The blue lines represent the paved portion of the trail. The red lines show where you have to exit the LOST and get on public highways.

The roads are good riding

If you are reasonably comfortable riding in traffic, then you should have no problems with the roads around Lake Okeechobee.

  • 78, on the west side of the Lake has wide shoulders and light (but fast) traffic. The rural drivers are friendly and almost always pull over into the other lane to pass, even when I’ve been on the shoulder.
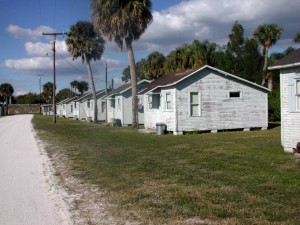
  • 441 on the east side of the lake has been recently repaved. The shoulders aren’t as wide as 78, but they’re fine. I’ve ridden it when it was under construction and the shoulders were broken up and survived.Taylor Creek fishing cabins and shellrock road from LOST to 441
  • The short jog around the Taylor Creek Lock on the north side isn’t a problem if you time your bridge crossing to miss the few short bursts of traffic that come along. Take the lane when crossing the bridge. If you are west bound, plan to move to the left side of the lane as soon as you cross the bridge so you can make a left turn to get back on the dike. The stretch between the dike and the road on the east side of Taylor Creek is shell rock. It’s usually packed pretty solid, but you can hit some soft spots. Be careful if you have narrow tires.

You are isolated on the LOST
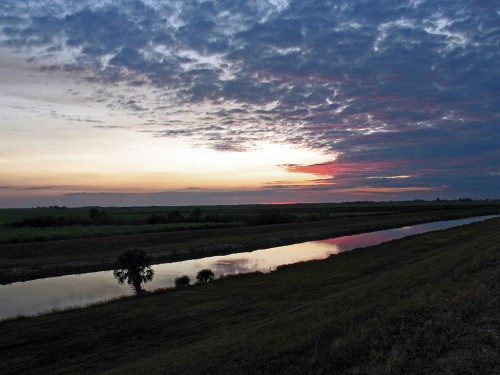
Sunset on the Lake Okeechobee Scenic Trail near Moore HavenOnce you’re up on the dike, you may have to ride seven or more miles to get to an access point because you have the lake on one side and the rim canal on the other.

There are no restrooms on the dike, no food, no services, so be prepared. There ARE primitive camp sites around. Before the authorities cut all the non-native trees and bushes, the campsites were relatively hidden. Now they are wide open.

What all all those blue markers?

I’ve tried to mark all the trail heads and access points I can remember. Some of them may not allow a motorized vehicle to pull in, but they are places where you could reach a road on your bike.

Don’t count on anyone recognizing the names I’ve given those access points. They are just what I call them, usually based on some geographical feature.

Places to eat
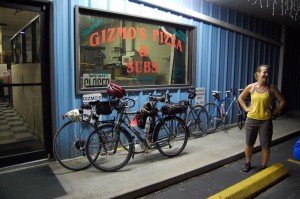
Gizmo's Pizza and Subs near Okeechobee, FL, just off the Lake Okeechobee Scenic TrailI’ve also marked a few places around the north and east side of the lake to eat. I highly recommend The Office bar at Nubbins Slough, Gizmo’s Pizza & Subs at Taylor Creek and the Golden Corral’s all-you-can eat buffet in Okeechobee. [Note Gizmo’s is no longer in business. I hated to see them close.]

I also mark the Scottish Inns in Okeechobee as an inexpensive, clean place to stay. Don’t expect a chocolate on your pillow, but the folks running it are nice and I’ve had a decent night’s sleep there. It’s not a place to park your spouse for the day while you’re out riding, though. The rooms are tiny by today’s standards.

Be careful out there

My riding partner, Mary, and I used to ride without helmets on the LOST because we thought we were more likely to have heat stroke than head injuries on a trail with no motorized vehicles and no obstructions to run into. Mary, for no apparent reason, crashed her bike about a mile north of the Chancey lock and wound up with five skull fractures. Help is a long way away when your partner is unconscious on the ground with head trauma.

Things to bring

  • Food and water
  • Sunscreen (there is no shade)
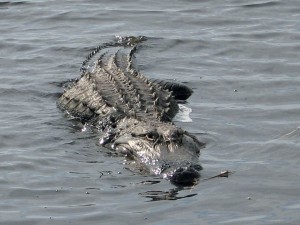
  • Gator on Lake Okeechobee Scenic Trail (LOST)Bug repellant, especially for riding around dusk. Glasses or some form of eye cover keeps flying insects out of your eyes. Some evenings the gnats and other bugs are so thick I pull a bandanna over my nose and mouth to cut down on the amount of protein I ingest.
  • An awareness of the weather. You’re the highest object around for scores of miles. Heat lightning in the distance makes for a great light show, but you want to get off the dike if it starts moving in.
  • A camera. I’ve seen something interesting every time I’ve ridden the LOST.
  • Good sense. Do NOT pet the alligators.

Electra Townie Original 7D as Commuter Bike

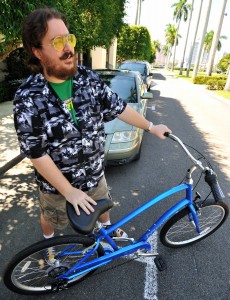
Ryan Before His Electra Townie Original 7D Inaugural Run[Guest bike review by Son Matt]

It’s always fun to spend someone else’s money.

Ryan was looking for a commuter bike. He is just two miles from work, doesn’t own a car and doesn’t particularly want a car. (He’d probably take a car if it were given to him but, for sure, he doesn’t want car payments, car repairs, car insurance and all the overhead associated with owning a car.)

A Commuter Bike, Nothing Fancy

We looked at hybrid bikes — something with an upright seating position, but thinish (28c or 35c, for example) tires; something that would take fenders and a rack. He obviously didn’t need a full touring bike for his two-mile commute. He certainly didn’t want the full-suspension mountain bike that I see so many commuters riding around town.

In flat Florida, he didn’t need much in the way of gearing range. Internal gearing would be sweet but outside of his $400 or so price range. As a utility cyclist, he wanted something that was comfortable to ride in regular clothes as opposed to the most efficient transportation.

Electra Townie 7D

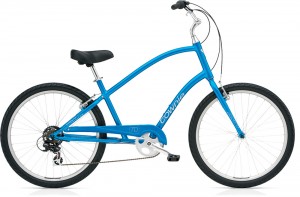
After test driving a few bikes (including a sweet Trek in the color of root beer), he decided on the Electra Townie 7D. Electra Townie Orignal 7D I’m sure you have seen the ads for the Electra Townie line of bikes. Their claim to fame is ‘flat foot’ technology: when you’re stopped, you can put your feet flat on the ground without leaving the seat.

More cruiser than road bike, more beach than mountain, the Electra Townie wouldn’t have been my first choice. (My utility bike is a Trek 7300.) The Townie is heavier than I’d like, and the tires are two inches wide for a lot of friction. Still, I gotta admit, it rides smooth and is really comfortable.

With a Shimano seven-speed rear derailleur (14-34 cassette), there is plenty of range for just about anywhere he’d like to go in South Florida. The lack of a front derailleur makes for less maintenance and allows for a nice factory-original chain guard.

Mandatory Accessories: Bell and Helmet

Ryan is going to hold off buying the fenders and rack but bought a nice bell and helmet. The Townie requires a non-standard rack for which they charge a king’s ransom (about twice what a standard rack costs). Ryan balked at buying the helmet until I pointed out that he keeps some rather important stuff in his head, and he spent a lot of money working his way toward a masters degree.

Inaugural Ride: Palm Beach Lake Trail

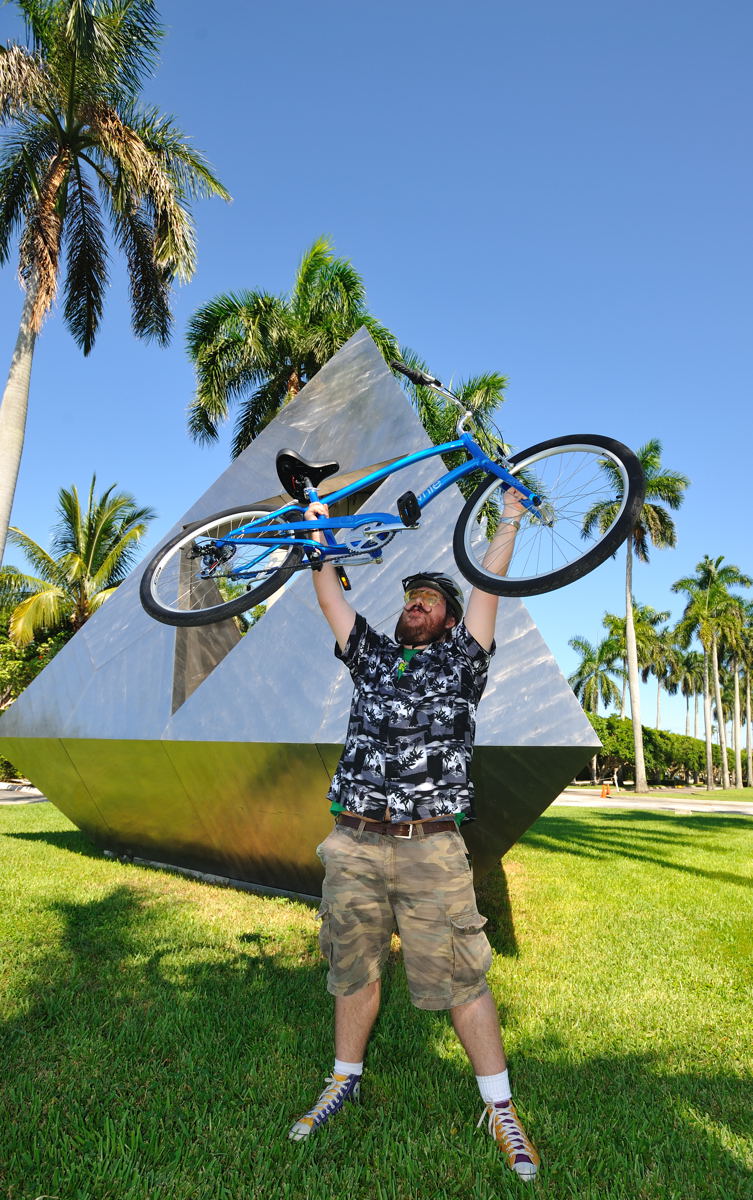
We hit the Palm Beach Lake Trail for the inaugural shakedown cruise. The weather was just about perfect. Ryan’s new Townie cruised straight and true. He is very pleased with the bike. I’ll follow up with him  after he’s gotten a few weeks of commuting under his belt to see if he is still just as happy.

Celebratory Bike Lift At Ride Completion

Ryan Does a Bike Power Lift After Completing the Ten-Mile Bike Ride

On What Do You Commute?

With Ken going on and on about his Surly Long Haul Trucker and the rest of us yapping about our carbon fiber this and fine Italian styling that, it’s easy to forget that most bikes on the road are used for utility and not touring or speeding along.

So, what’s your other bike? You know, the bike you actually use to take the kids to school, go to the grocery store or just take a ride over to the local pub. What bike to do you ride when you’re not riding your real bike?

—Matt

GABS Saddle: Crazy or Best Bike Saddle You’ve Seen?

My virtual buddy over at Screaming Bike Monkey posted a picture of this saddle with the comment, “No words can adequately express my feelings at this time…”

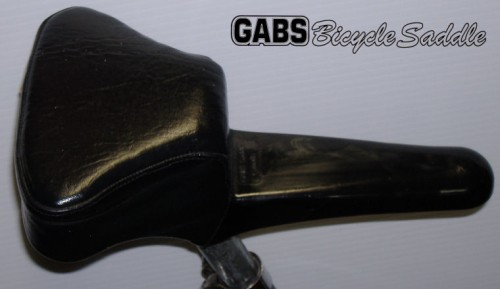
Gabs Bicycle SaddleI wasn’t sure if that meant that he was so in awe of the concept that he was speechless; whether he hated it so much the “If You Can’t Say Something Good, Then Don’t Say Anything Rule was in effect or if he was, like me, looking for quick content for his blog. [Wife Lila said that I shouldn’t have put that last reason in. I overruled her. Some days you go for the easy and you should just fess up and admit it.]

The inventor has ridden more miles than I have

Part of the history of the saddle says,

George Andrews, inventor of the GABS bicycle saddle“GABS Saddle was designed by George Andrews, Courtenay, British Columbia, Canada, as a result of Thousands of cycled kilometers.
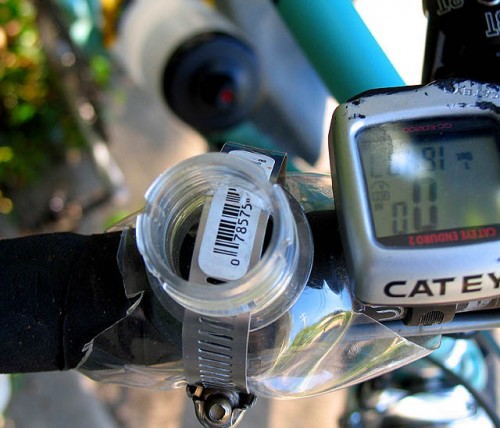
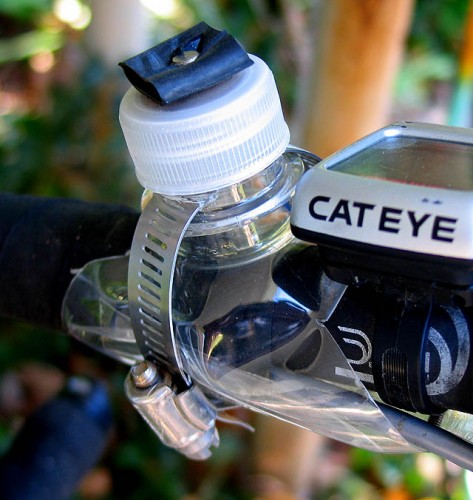
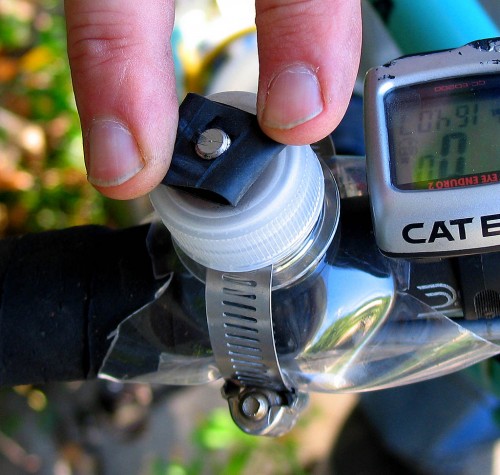
George cycles almost every day and has done so since he decided in May 1994, at the age of 65 to cycle across Canada.  He completed the ‘cross-country’ journey in 1995 when he cycled from Tofino, BC to Cape Spear, Newfoundland.  In June of 1996 he cycled to Salt Lake City, USA.

Of course, I always switch to metric distances when I want to impress people too. As in, “I rode a (metric (said in a lower volume)) Century this weekend. Actually, if you didn’t drop your voice when you said “metric,” most non-bikers would think metric meant “metered” or something that sounds even more impressive.

A tip of my helmet to him

I give George applause for coming up with an idea and seeing it through to distribution.

It’s not the craziest design. I’ve seen the ones that have two separately adjustable butt cheeks holders without a nose. It might be OK for casual riders, but a nose is important for controlling the bike, particularly when standing up on the pedals.

In some respects, it resembles an extreme version of the cutout saddles that are supposed to relieve pressure.

What happens when you’re “on the rivet?”

I wonder, though, what happens when you’re “on the rivet,” as cycling commentator Phil Liggett likes to say. That’s where you find yourself sliding forward on the saddle when you’re tired or to put maximum pressure on the pedals. You would find yourself suddenly dropping down what appears to be a couple of inches.

Scream Monkey has a point about the GABS Saddle

I’m not sure I can improve on his comment, “No words can adequately express my feelings at this time…”

I just took a whole bunch more words to come to that conclusion.

Go see George for the whole story of the GABS Saddle

Camera Mount Out of a Soft Drink Bottle

I’ve tried several different ways of mounting my camera to my handlebars depending on what camera I was using and what materials were at hand. I finally settled on a RAM mount for my cameras.

Bro Mark, who is a weight wienie, usually carries a tiny camera (now probably replaced by his trendy iPhone).

Recycle a soda bottle

He created a camera mount out of the top of a plastic soda bottle using the bottle and cap, a stainless steel hose clamp similar to this (size will depend on your handlebar), a piece of inner tube and a 1/4 x 20 bolt. You can find all of it at your local hardware store or in the bowels of your junk drawer.

Base of homemade camera mount constructed from plastic soda bottle

Trim to bottle to size

Step One is to trim the top off the bottle. You can do this with a knife or a pair of scissors. With a little pruning, you can leave enough of the bottle to protect your bars. (He said he left strips about three inches long for the wrap-around)

Cut slots for the hose clamp

Step Two is to cut slots into the bottom of the bottle top to hold the hose clamp. I was going to ask Bro Mark how he did it, but he’s tied up on an advertising shoot in Memphis. That means I’m going to wing it and let him make any corrections in the comments section.

Side

I’m going to guess that the easiest way to do it would be with a Dremel Tool if you have one. Since I don’t, I’d be inclined to tackle it with a hacksaw. It’s not rocket science, so anything that will cut two slots and leave you with most of your fingers will work.

[Bro Mark surfaced long enough to say that he thinks he cut the slots with an exacto knife. That might explain what looks to be a scar on the finger on the left.]

Drill a hole in the bottle cap for a 1/4″ x 20 bolt

Top of camera mount made from plastic soda bottleStep Three is to install the bolt to hold the camera.

Camera tripod screws are a standard 1.4″ x 20 thread available at any hardware store.

This is a case where bigger ISN’T better. Get a bolt that’s just long enough to go through the bottle cap and any cushioning material (washer, inner tube) and just far enough into the camera tripod socket to be secure. Mark said he added a lock washer on the bottom and top of the bottle cap (below the inner tube).

Safety warnings

  • DO NOT, DO NOT get one that is one screw turn longer than necessary or you’ll punch through the bottom of your camera. That is a very Bad Thing.
  • I always use a lanyard with any device I attach to my handlebars: GPS, still camera or video camera. That’s to keep from hearing the sickening thud when the expensive device hits the ground, followed by the skittering and disintegrating noises as it disassembles itself.

Use it as a camera mount OFF the bike, too

Make up a second bottle top for use off the bike. When you want to stabilize your camera, fill a soda bottle with water, sand or something heavy, put on the top with the tripod screw and you have a ready-to-use camera support.

Glo Gloves Add Safety to Night Riding

If you’d rather ride than read, skip straight to the video

I stuck my video camera on a RAM mount on my buddy George Primm’s bike and asked him to hang with me on a ride through West Palm Beach and Palm Beach. George was a copy editor  in his former newspaper life, not a photographer, but he did an OK job.

His bike had some fairly low-powered lights, so the reflectors would have shown up much brighter in car headlights. Still, you can get a pretty good idea of how your signaling is much clearer with the Glo Gloves.

For you detail-oriented folks:

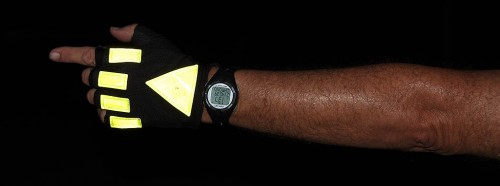
Glo Gloves make your signals visible under low light

I’m a night rider. I like it because it’s cool and traffic is calmer and better behaved at night.

To see and be seen, I have a SON generator powered B&M Lumotec IQ Cyo R N Plus light on the front, along with at flashing 5-LED ViewPoint Flare.

In the back, I have two taillights. A huge 4×6-inch 18-LED RealLite flashes like a billboard and a solid generator-powered B&M Busch&Müller 4DToplight Senso Multi with battery standlight. I used to have a NiteRider taillight, but my battery died and I haven’t felt the need to replace it.

I’m a fan of reflective material

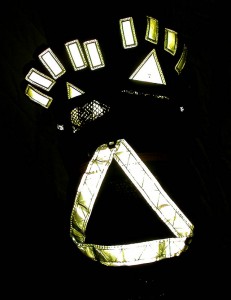
Slow Moving Vehicle triangle and Glo Gloves on Camelbak M.U.L.E.I have a large Slow Moving Vehicle Triangle on the back of my CamelBak M.U.L.E.. I also stick my Glo Gloves where they add some flash back at vehicles behind me when I’m not wearing them.

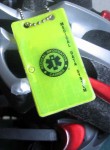
Medical Data SystemAfter my riding partner had an accident in the middle of nowhere and I didn’t have any contact info for her family, I wear two Medical Data Information tags made of reflective material.

One is attached to the back of my helmet (you’ll be able to see it flashing in the video); the other is on the Camelbak.

So, what are Glow Gloves?

Glo GlovesIn 2003, someone named Glolady asked if any of the folks on the phred bike touring list would like to test some prototype gloves. Shortly after I volunteered, a pair of Glow Gloves arrived. They looked pretty much like the Original Glo Glove shown on the web site.

I really liked the large red triangle on the palm, but they weren’t overly comfortable on the bike and they tended to slip on the bars. They were redesigned with the red reflective material higher on the wrist and a better gripping palm and named the Sport Glove.

Not enough padding in the right places

I still didn’t like them as a standalone biking glove, because they didn’t have enough padding in the right places for my taste.

What I DID discover was that they were stretchy enough to pull right over my normal gloves when I wanted that extra bit of visibility.

I rediscovered Glo gloves recently

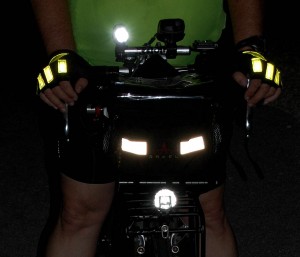
Glo Gloves show up well with your hands on the barsI’ve been riding with some new folks lately and I’ve been stressing about how you need to claim your space on the road and to clearly convey your intentions.

I pulled on the Glo Gloves and found myself interacting with drivers more (and not just with a single digit). If I’m coming up to an intersection and see a car that looks like he may pull out, I’ll holler or whistle loudly while holding up a highly reflective hand. It’s actually more effective than my Delta Airzound Bike Horn in some cases. As I pass the intersection, I’ll give a friendly wave “thanking” them for doing the right thing, like not running over me.

Another nice thing is that the gloves add reflectivity to the front and sides of your bike when your hands are on the bars.

(The two white horizontal reflectors are on the Arkel Small Bar bag.)

Editor’s note: My Glo Gloves were provided for evaluation in 2003 and GloLady was kind enough to send me a new pair for review to make sure that I had the latest version. You can go to the Glo Glove website to find a dealer.